How to delete an Instagram account after saving your data
Check Instagram's official export, deactivation, and deletion routes, distinguish its account-settings layouts, and record the cancellation deadline.
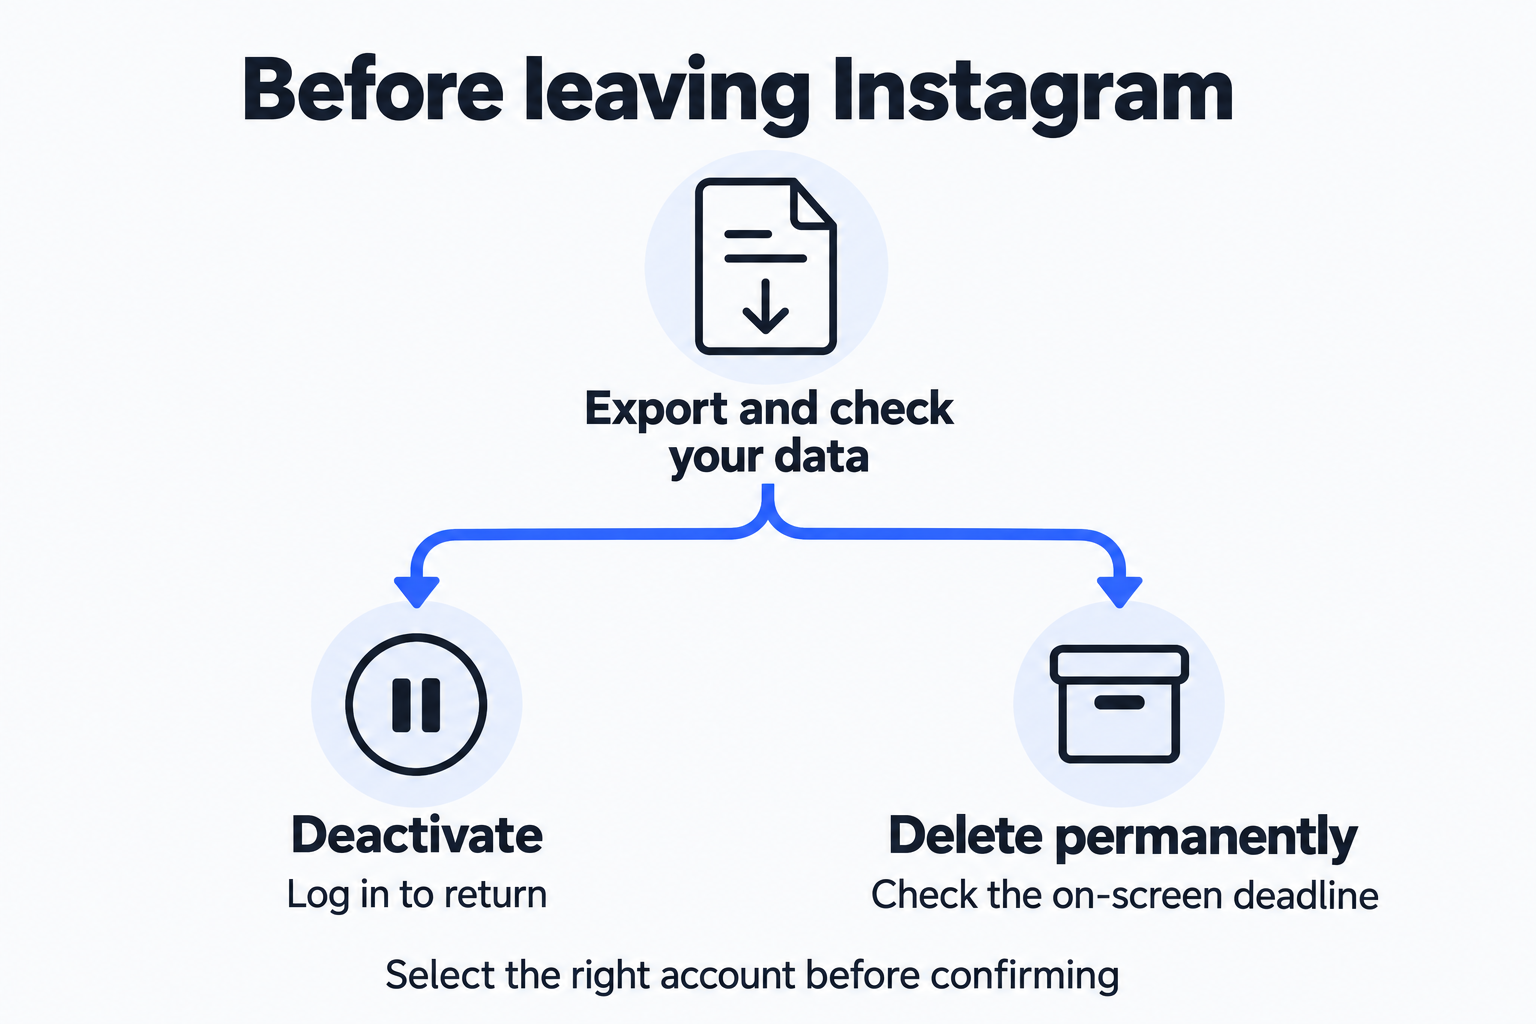
Save your data first, then choose a temporary break or permanent deletion.
To delete an Instagram account, go through its account settings. Before confirming, export the photos, posts, and other information you want to keep, open the files to check them, and decide whether you want deactivation or permanent deletion. Deactivation hides the profile and related content until you log back in. Permanent deletion removes the profile, photos, videos, comments, likes, and followers, with a waiting and cancellation period after the request.
This guide follows Instagram’s current public help pages and preserves the two routes introduced by its settings migration. In this browser check, Instagram showed the English login screen. We did not log in, so the account’s export, deactivation, and deletion confirmation screens were not tested. The real screenshots below show the English official help pages. Use the labels and deadlines displayed in your own logged-in account when taking action.
Choose the result you actually need
The official deactivation guide describes temporary deactivation as hiding content until you reactivate by logging back in. It also says you can deactivate only once a week. If you want a break while retaining your account’s information, this is the option that fits.
The official deletion guide lists the information that will be permanently removed and says the export tool is unavailable once the profile has been deleted. If you have decided to leave permanently, save the information somewhere you can access first. Uninstalling the phone app changes the app’s installation on that device; it does not complete this account-deletion process.
| Your goal | Choose | Check before proceeding |
|---|---|---|
| Hide the account temporarily and return later | Deactivate account | You can log in; understand that logging back in reactivates it |
| Permanently remove the account and its content | Delete account | Your data is saved; verify the account and cancellation deadline |
| Limit who can see your content | Privacy or blocking settings | Whether visibility controls alone solve the problem |
For the last goal, adjust privacy settings directly. Instagram’s deactivation guide also suggests making posts private or blocking people as alternatives. Permanent deletion adds unnecessary steps if you only want to change who can see the content.
Turn the export into a usable backup
The official export page currently gives this computer route: More → Settings → Meta Account → Your information and permissions → Export your information. It also says some people will still see Accounts Center. Look for the same Your information and permissions and Export your information labels there.
In the export tool, select Create export, choose the Instagram profile to export, and select Export to device. Then choose information categories, a date range, format, notification email, and media quality before starting the export. For an account you are leaving, the date range should cover the information you need rather than simply accepting a short default period.
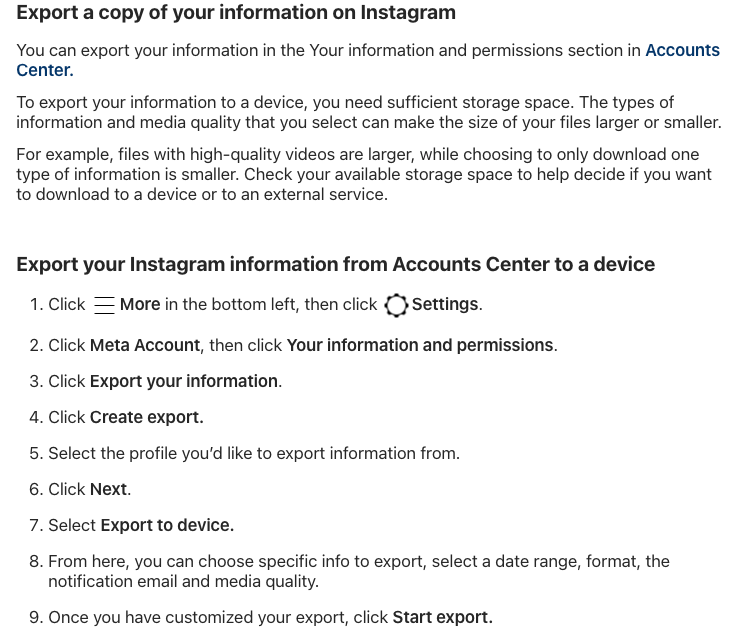
The official guide puts profile selection, export to a device, and range and quality settings in one workflow.
More source material and higher-quality videos produce larger export files. Check the free space on your device first, and select categories in separate requests if necessary. Exporting to an external service adds connection and authorization steps for that service. This guide uses export to a device so you can directly check that the files are available before deleting.
Instagram says it can take up to 30 days to email an export link. Once the export is ready, the Available downloads window lasts 4 days. Those periods describe different things: preparation time and the time available to download the prepared files. Wait for the notification after making the request, then save the files promptly. A created request is still waiting to become a usable backup.
After downloading, use a short checklist and keep your own record:
| Check | Record |
|---|---|
| Profile and export scope | Correct profile name, selected categories, and date range |
| Files open | Archive extracts; a few photos or post records actually open |
| Content is sufficient | Needed categories are present, without obvious gaps |
| Storage location | Files are accessible to you, with room to keep a second copy |
This checks whether the exported files meet your retention needs. Some information retained for security or legal reasons may not appear in the export, and a new export cannot guarantee recovery of previously deleted content.
Identify the account-settings layout you have
The deletion page now opens with a notice that Meta is gradually moving people to Meta Accounts. Your settings may therefore be called Accounts Center or Meta Account. The screenshot also preserves two Accounts Center layouts, so an old tutorial’s fixed button location may no longer match.
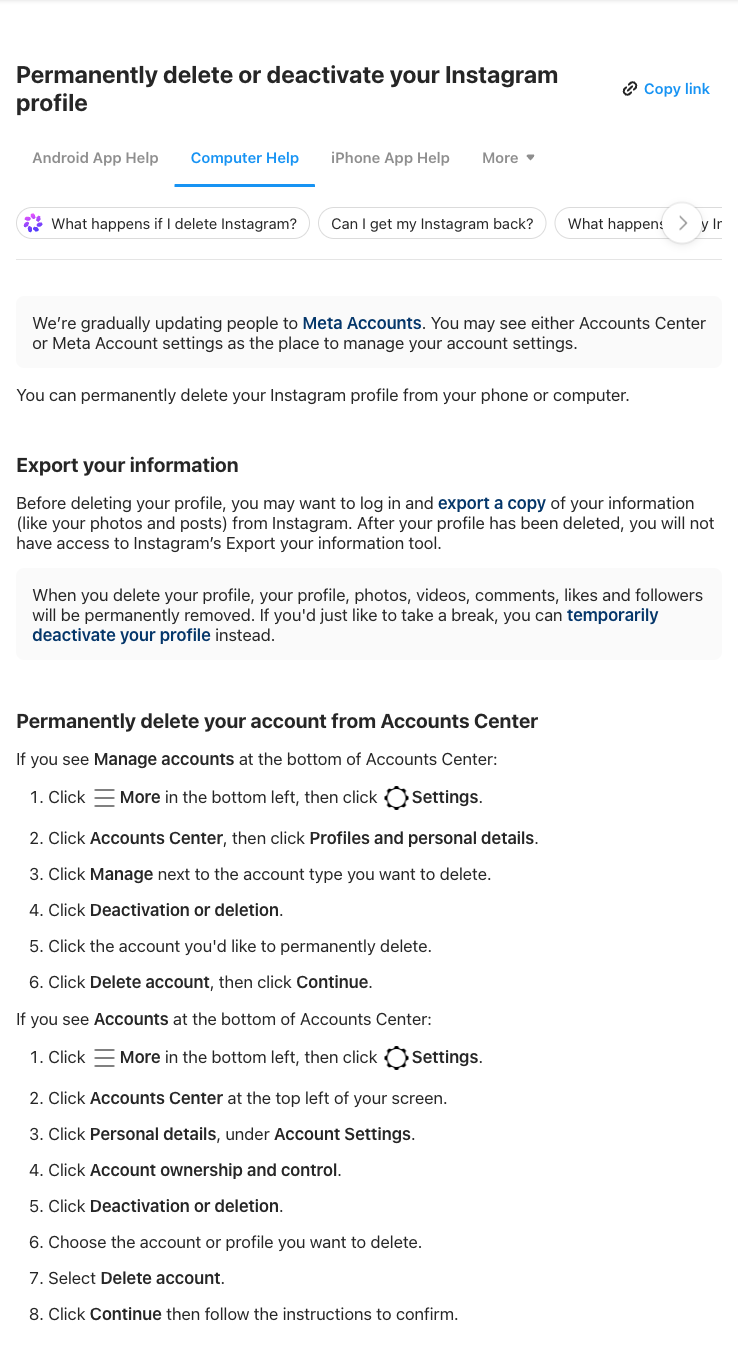
The same official page lists separate instructions for the Manage accounts and Accounts layouts.
On a computer, start with Instagram’s More → Settings and identify the layout:
-
If the bottom of Accounts Center shows Manage accounts, the deletion page gives Accounts Center → Profiles and personal details → Manage beside the relevant account type → Deactivation or deletion.
-
If it shows Accounts, the route is Accounts Center → Personal details → Account ownership and control → Deactivation or deletion.
Then select the specific Instagram account or profile and the operation you want. Accounts Center can contain several accounts. Check the name and profile picture carefully, especially when managing both personal and work accounts. The surrounding menus may differ in a phone app or mobile browser, but the target account and operation label still need checking.
If your settings have fully changed to Meta Account and those intermediate labels are absent, look for Deactivation or deletion in the current profile-management settings and consult the official guide’s device options. Do not choose a differently named operation simply to follow an old button position.
For a temporary break choose Deactivate account
After selecting the target Instagram account in Deactivation or deletion, choose Deactivate account for a temporary break and follow the current confirmation screen. Keep a record that this was deactivation. Logging back in will reactivate the account, and the once-a-week limit should be part of your plan.
The current deactivation help page contains inconsistent wording: some subheadings and an older route still say permanently delete or delete, while another branch explicitly lists Deactivate account. This guide distinguishes the options using the page’s opening definition and the explicit action label. Do not follow a Delete account confirmation when your intention is deactivation. If your screen offers only deletion, stop and consult the official help for that device or use another officially supported entry point.
For permanent deletion record the on-screen deadline
Select Delete account in the deletion route. After Continue, read the current screen before deciding to confirm. Any additional identity verification, reason selection, or password entry belongs to the account owner in the official interface. The later form was not tested here, so follow the fields and final button shown in your account.
The deletion guide says the profile and information are permanently deleted after 30 days, while also noting that the number of days allowed for cancellation varies by region. Record the deletion date or cancellation deadline on the confirmation screen instead of calculating a universal deadline by adding 30 days. Save the cancellation method shown there as well. If you decide to cancel, log in promptly and check the current cancellation flow.
During that waiting period, the official guide says the content is inaccessible to other Instagram users. That differs from the time needed to complete backend deletion. Processing can take up to 90 days after it begins, copies may remain in disaster-recovery backups, and some information may be retained for legal issues, terms violations, or harm prevention. Account deletion is not a promise that every storage system becomes empty on the same day.
Once the profile is deleted, Instagram says you can register with the same username if someone else has not taken it. This does not preserve the old account’s information or reserve the name for you. If retaining the original relationships and content matters, reconsider temporary deactivation before confirming.
If you cannot find the route restore access first
Both deletion and temporary deactivation require access to the account. Instagram explicitly says it cannot delete a profile for you for security reasons; you need to log in to request deletion. If you have forgotten the username or password or cannot pass verification, start with the official login-recovery help rather than giving a third party your password to delete the account.
Work through four concrete checkpoints: data exported and checked, target account verified, deactivation or deletion selected, and the on-screen result recorded. For deactivation, keep the reactivation conditions. For deletion, keep the actual cancellation deadline and method. More reusable digital processes are in Trylog Workflows.