1024x1024 Image Converter: Choosing Crop, Padding or Stretch
Compare six actual 1024×1024 exports from the same landscape and portrait images, then check pixel dimensions, proportions and retained content.
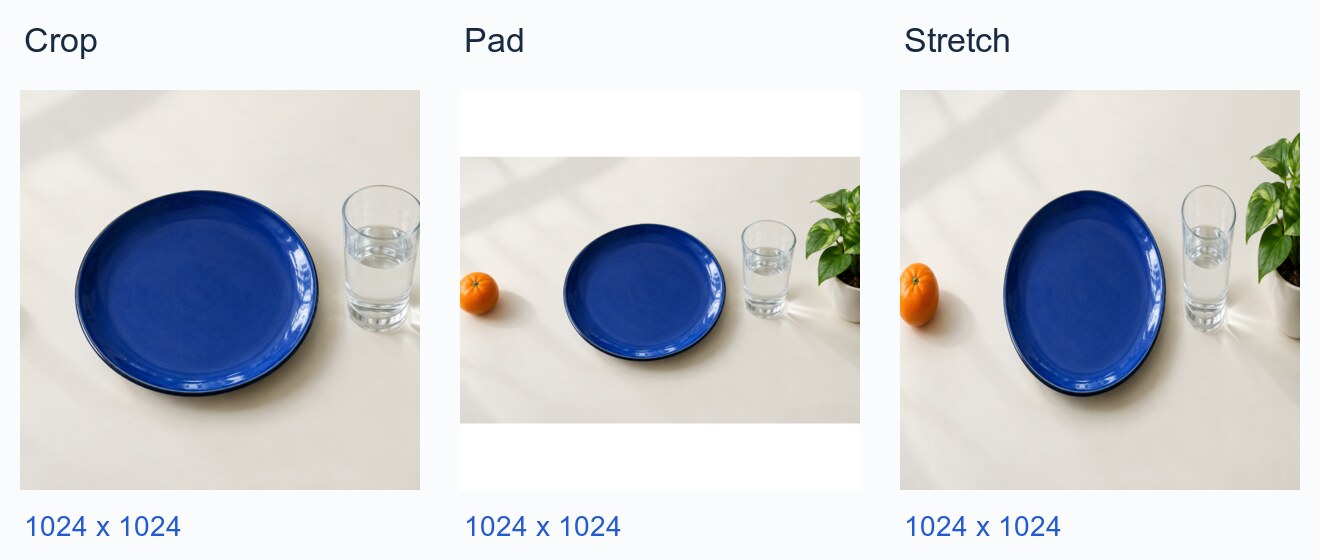
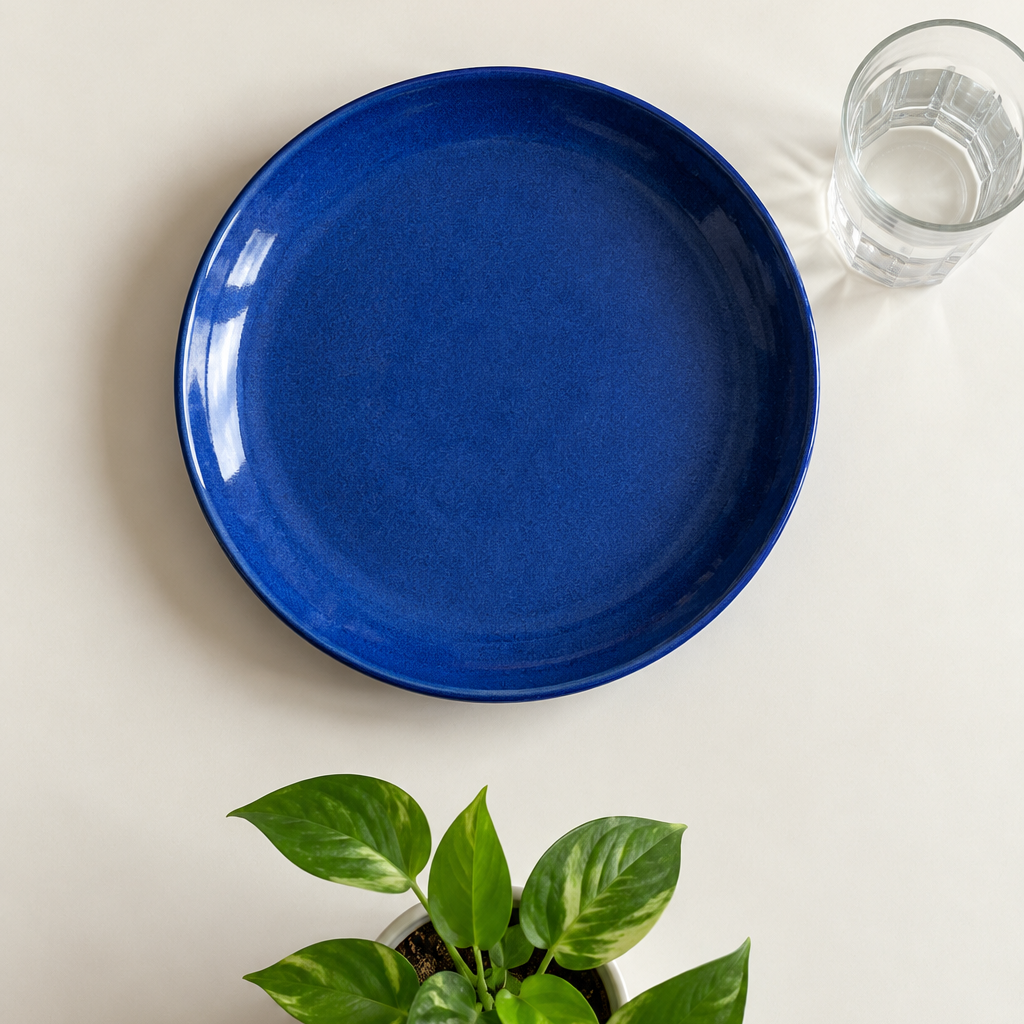
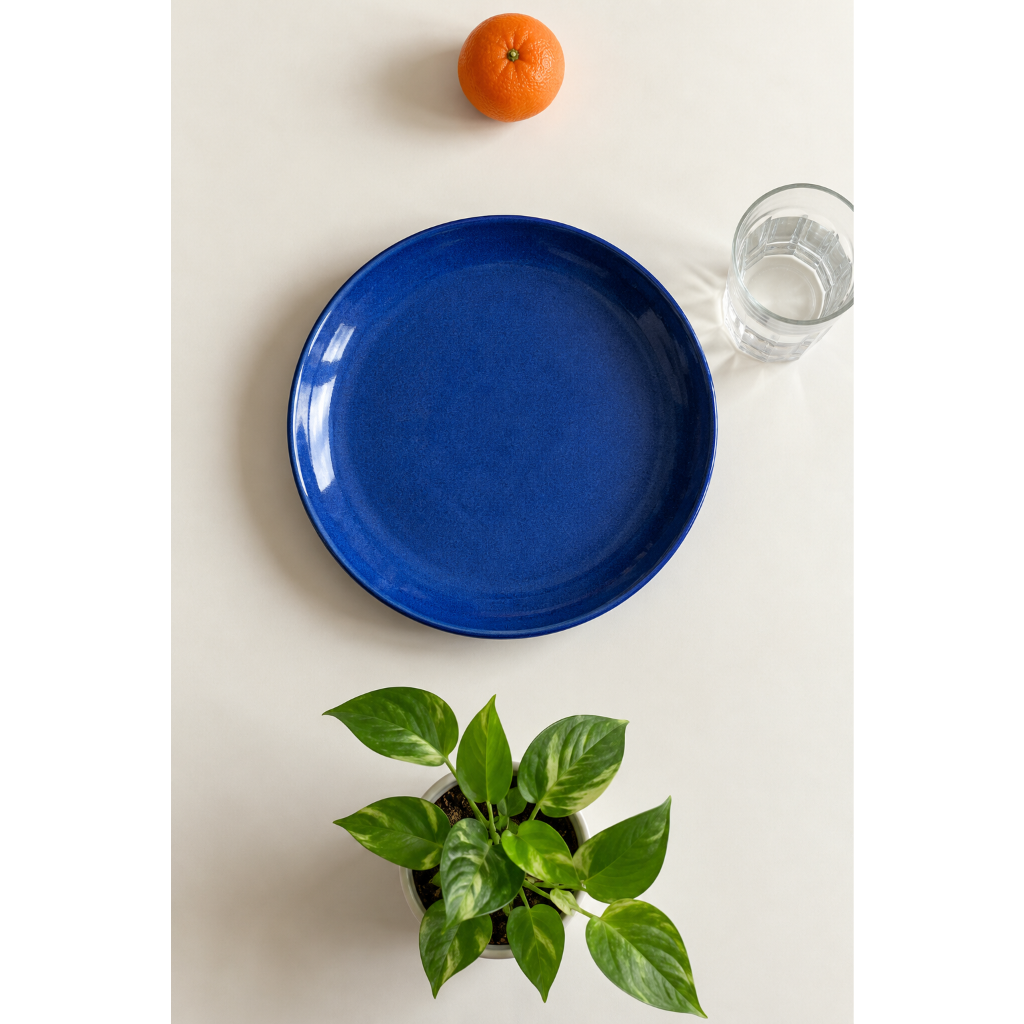
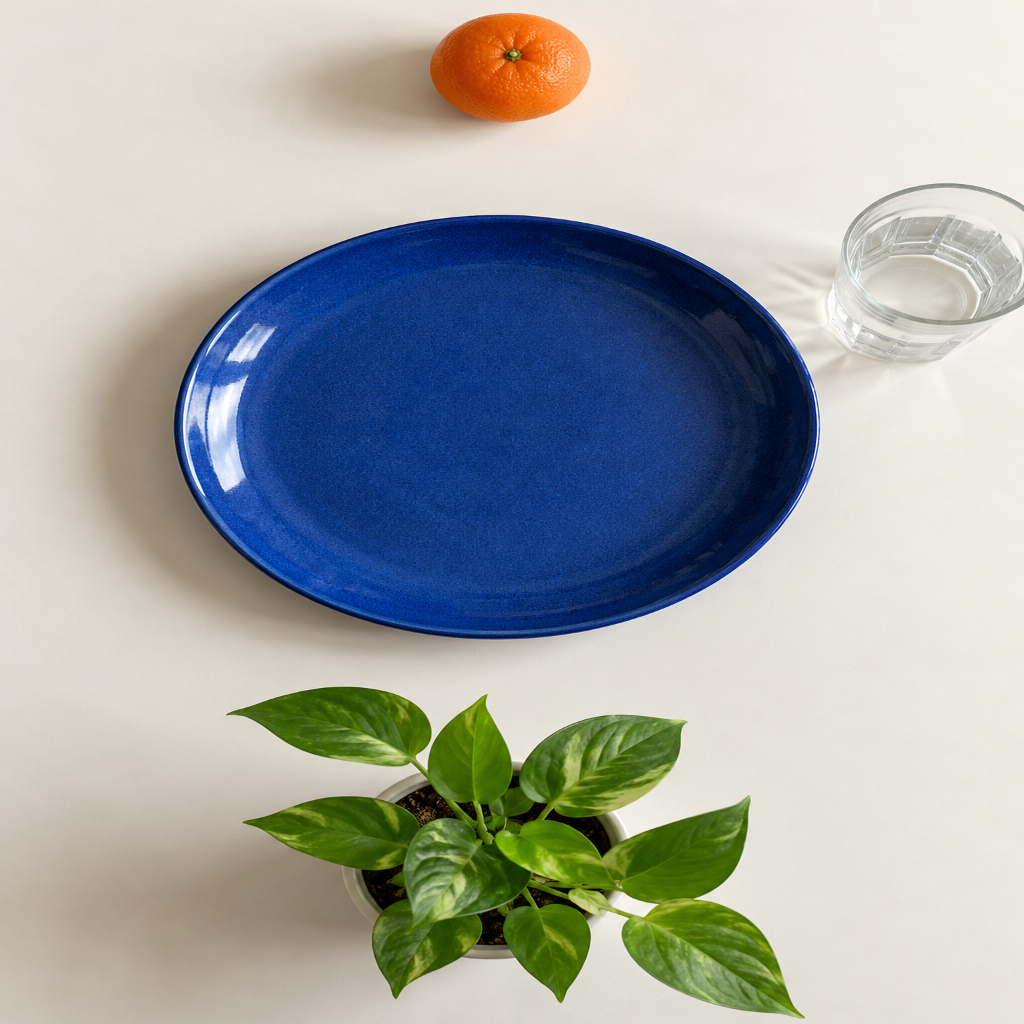
All three images are 1024×1024. The orange disappears on the left, white borders appear in the middle, and the plate becomes narrower on the right. That choice is easy to miss when searching for a 1024x1024 image converter. Pixel dimensions determine whether a file meets an upload requirement; the fitting method determines what the picture looks like.
For this comparison, two original AI-generated still-life images were processed in BatchTools, with separate crop, padding and stretch exports. The inputs were a 1536×1024 landscape image and a 1024×1536 portrait image. All outputs were PNG files. The plate makes changes in shape visible, while the orange and plant near the edges show which parts of the scene survive.
Adjust the preview, then download your result
Open the 1024×1024 image converter and choose one JPG, PNG or WebP. Select Crop, Fit or Stretch, check the result in the same preview, then choose Download PNG to save the current version. Your image stays in the browser, with no login or upload. Each input can be up to 20 MB and 24 megapixels.
Crop starts with the largest centered square. Drag the image to frame your subject and use Zoom for a closer crop. You can also focus the preview and use arrow keys, or open Fine-tune position for position sliders. Reset framing restores the centered view at 100% zoom. Fit keeps the whole image with transparent padding by default. Choose Solid color and click the color swatch to open a picker with a color field, hue strip and common colors. Stretch fills the square by changing the original proportions.
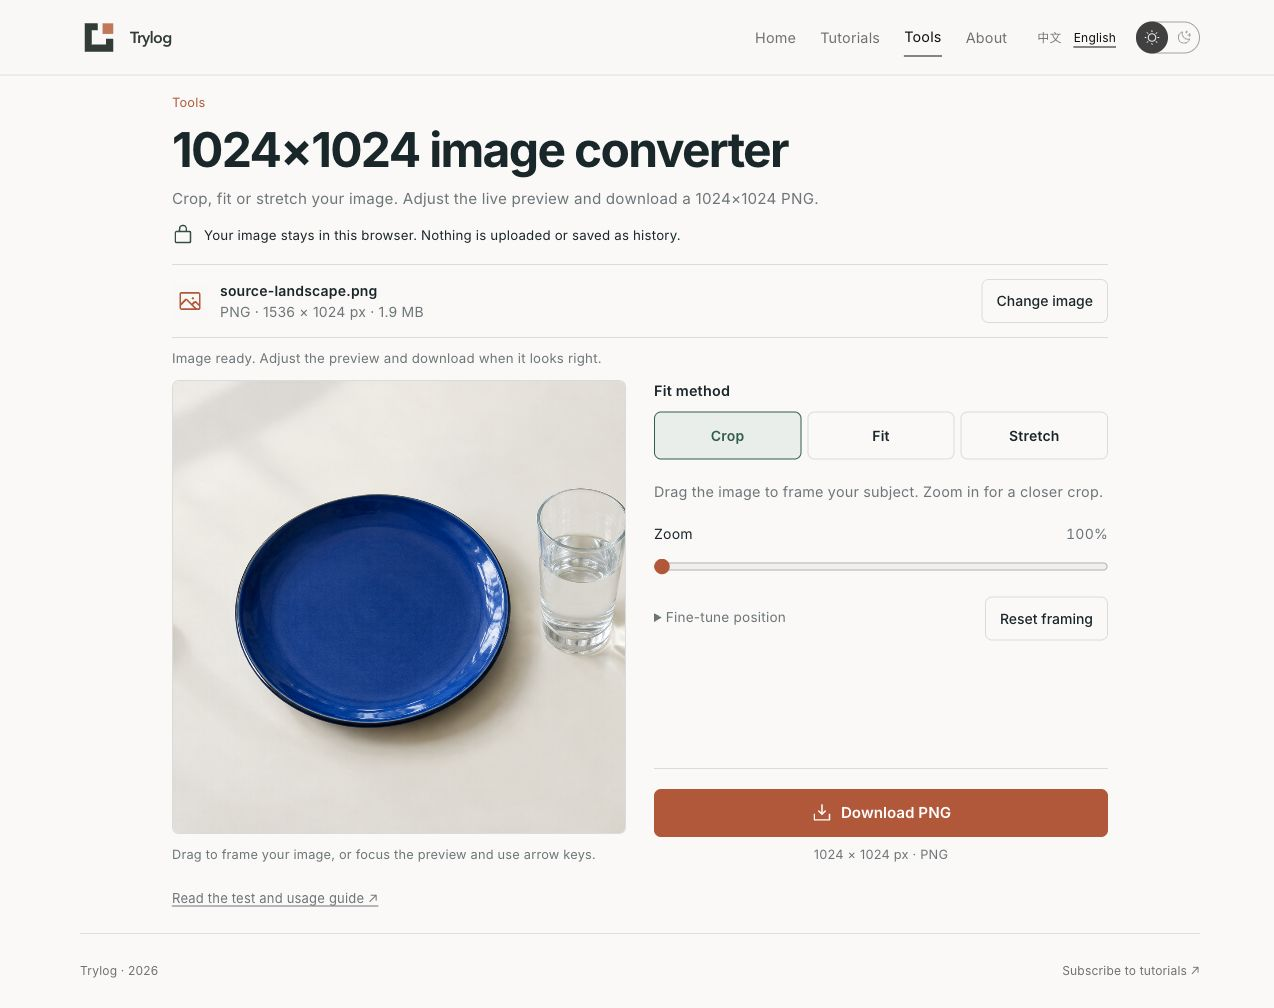
Drag to adjust the framing, then download the current preview as a 1024×1024 PNG.
Change image opens the file chooser directly. Canceling or choosing an unsupported file keeps your current image and adjustments; a valid new image replaces it after loading. Switch fitting methods and download again to save all three versions separately. The rest of this article preserves the original BatchTools test of the same landscape and portrait samples, including its six downloads, so you can compare the geometry.
Decide whether the subject or the whole picture matters
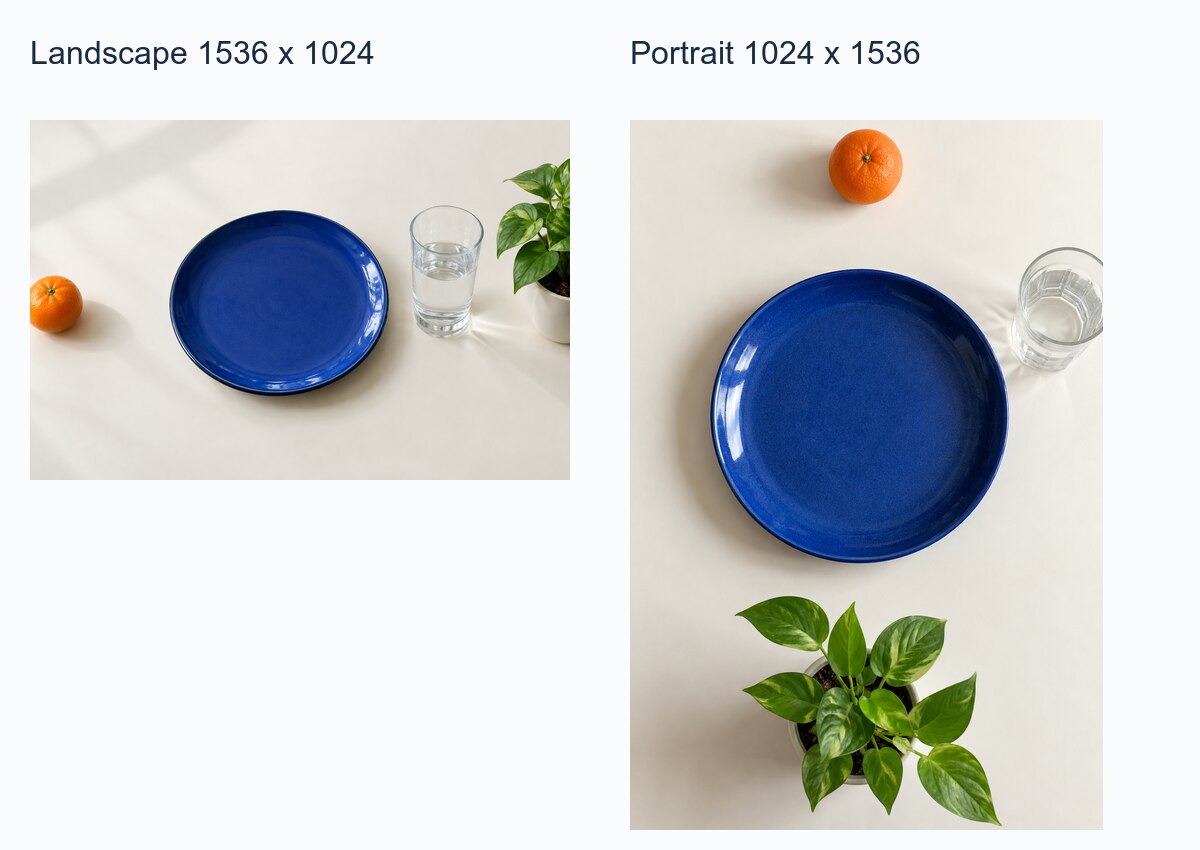
The inputs have 3:2 and 2:3 aspect ratios. The destination is 1:1. Something has to happen to the longer dimension: filling the square, retaining the entire picture and preserving its proportions cannot all be achieved at once.
Cropping works for avatars, cover cards and images with a clear main subject. The subject fills the square while surrounding scenery can be sacrificed. Padding works for product appearances, receipts, complete interface screenshots and posters containing text. The entire image fits inside a square canvas, with background filling the unused space. Stretching changes width and height independently, which also changes faces, circles and letterforms. It is suitable only for textures or backgrounds whose shapes can tolerate that distortion.
When an upload service requires a square, start by asking whether information at the edges can be lost. If it can, position a crop box. If it cannot, add padding. Check the subject’s position before accepting a crop; centering is only the starting point used in this comparison.
Export the three versions in BatchTools
The BatchTools 1024×1024 page describes cropping and adding a background. Its working interface also offers Stretch/Compress. The actual controls include width, height, units, PNG, JPEG and WEBP formats, plus a ZIP download for multiple images.
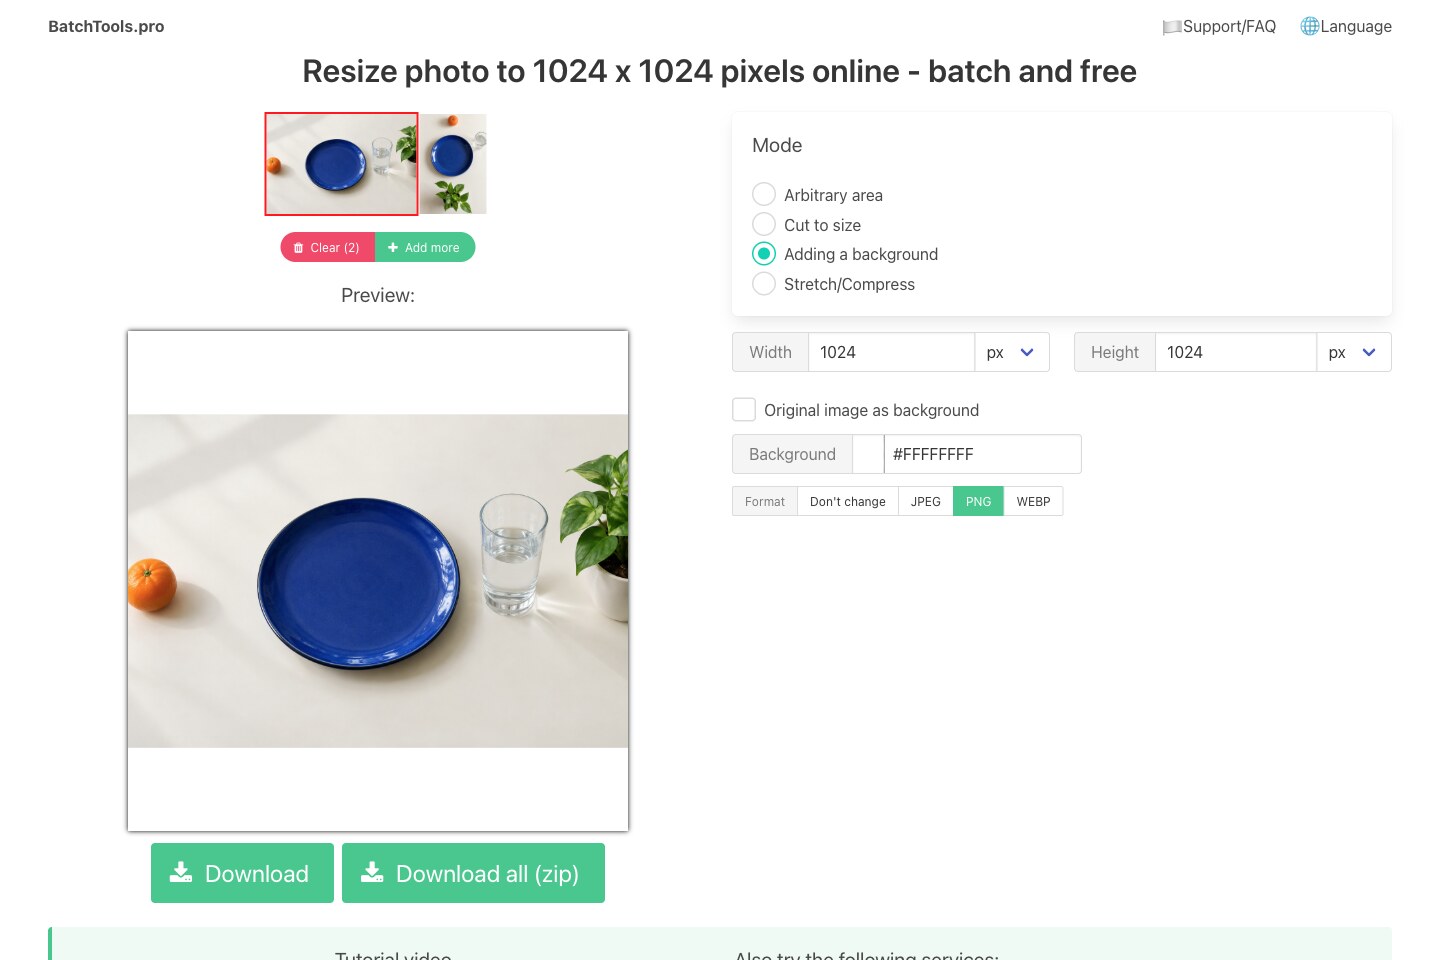
For padding, set both Width and Height to 1024 px, select Adding a background and PNG, and use #FFFFFFFF for white.
The process was:
-
Click Get Started and select the source images. Both samples were selected together, and the same inputs were used for all three modes.
-
Choose Cut to size, enter 1024 for both dimensions, use px and select the square crop shape. Inspect the preview and keep the required subject inside the box. This comparison used the default centered position.
-
Select PNG and click Download all (zip) to save the crop group.
-
Switch to Adding a background, keep 1024×1024 and a white background, then download the padding group.
-
Switch to Stretch/Compress, keep the same dimensions and format, then download the stretch group.
ZIP is simply the batch packaging. After extraction, each image file is what you submit to the upload service. Selecting one image and using Download also provides an individual export.
PNG was chosen to compare geometry without adding JPEG compression artifacts. PNG encoding is lossless, but reducing an image still resamples its pixels, and cropping still removes part of the scene. JPEG can be useful when a smaller photographic file is needed. For text, transparency or further editing, keeping a PNG master is often more practical. The interface offers several formats; the file checks here cover PNG only.
How landscape and portrait crops differ
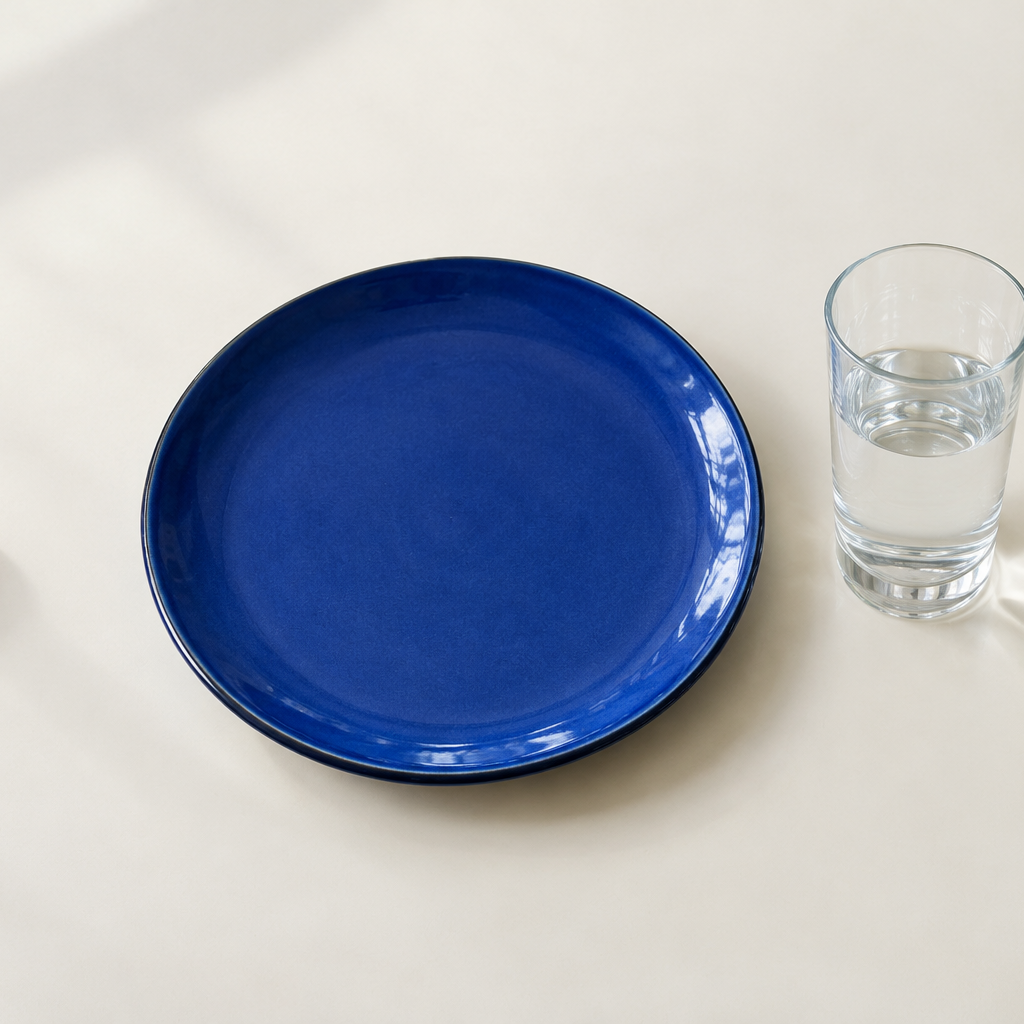
The landscape input is 1536×1024. A centered 1024×1024 crop removes 256 pixels from each side and retains two thirds of the original image area. The downloaded crop was pixel-for-pixel identical to the central 1024×1024 region of the source. The orange disappears, the plant on the right leaves the frame, and the central plate retains its original outline.
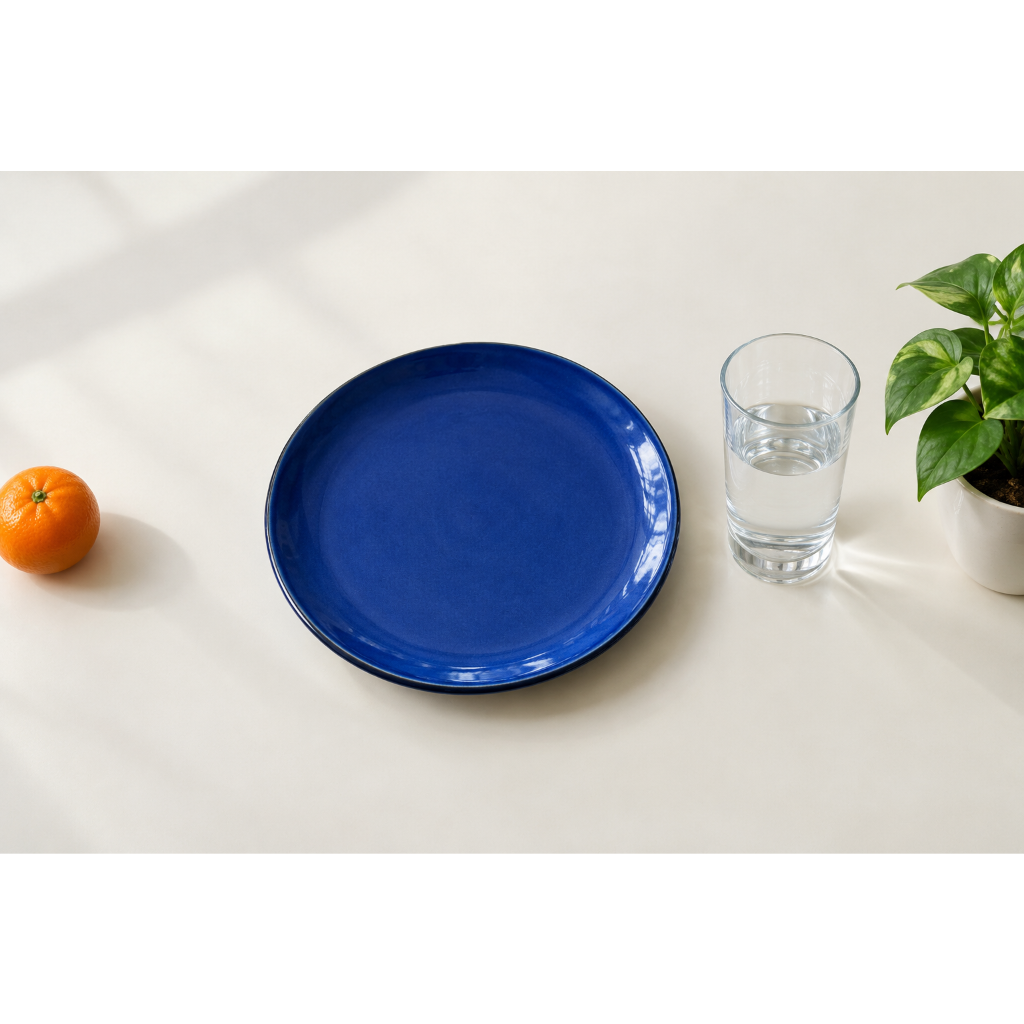
Padding scales the landscape image proportionally to 1024×683 and places it inside a 1024×1024 canvas. The downloaded file has 171 white pixels above the image and 170 below it. With an odd number of remaining pixels, one side needs an extra pixel. The orange, plate, glass and the portion of the plant visible in the original are retained, although the whole scene is smaller.
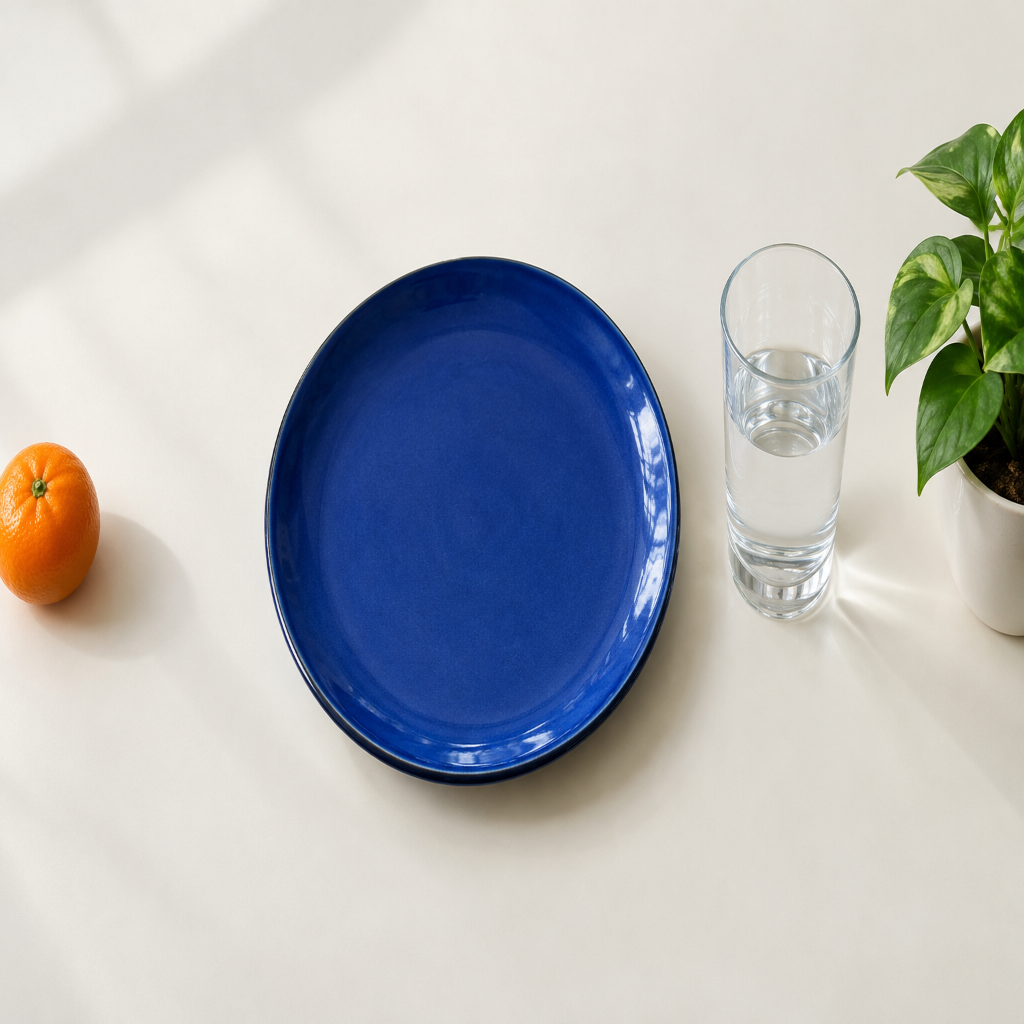
Stretching reduces the width to two thirds while leaving the height unchanged. The orange and plant remain, but the plate is squeezed horizontally and the glass looks slimmer. The file passes the size check while changing the source image’s shapes.
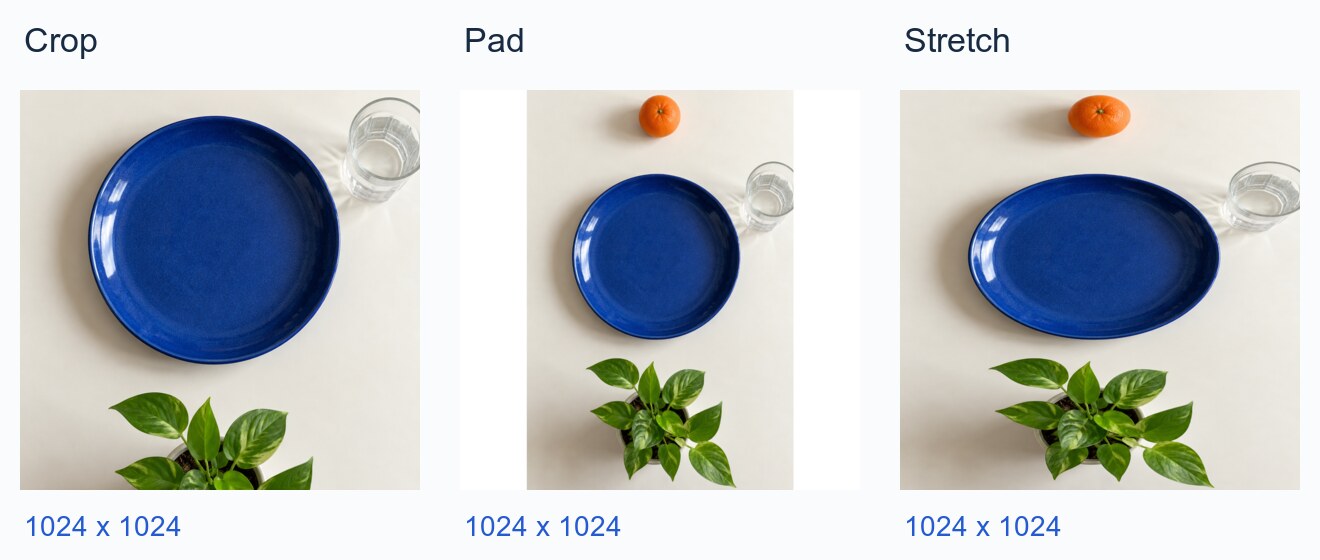
From left to right: centered crop, white padding and stretch. All three downloaded files are 1024×1024.
The portrait image changes in the opposite direction. Cropping removes 256 pixels from the top and bottom: the orange disappears and only part of the plant remains. Padding produces a 683×1024 photograph, with 171 white pixels on the left and 170 on the right, preserving the whole image. Stretching reduces the height to two thirds, making the plate look flatter and wider.
Keeping a subject intact and keeping the entire scene intact are different requirements. The landscape crop preserves the plate, so it may work as an avatar for that object. If the picture needs to show the full arrangement on the table, padding fits the task better. For product images, also check shadows, handles and package text instead of looking only at the object’s center.
Calculate the proportions before converting
For a source with width w and height h and a target side length of 1024, padding uses one scale factor so both dimensions fit inside the canvas: min(1024/w, 1024/h). Cropping first covers the canvas with a scale factor of max(1024/w, 1024/h), then removes the excess.
For the landscape sample, the padding factor is 2/3, giving approximately 1024×682.67, rounded to 1024×683 in the output. The centered crop uses a scale factor of 1, so it can take the middle square without resizing. Stretching uses two factors, 2/3 horizontally and 1 vertically, changing the outline’s proportions.
Smaller sources also require an enlargement check. A 600×400 image must enlarge its 400-pixel short side to 1024 to cover the square, a factor of 2.56. The file contains more pixels, but the original does not gain new detail. If the upload requires exactly 1024, that file size is still necessary; starting with a higher-resolution source is preferable.
Check the downloaded file and the picture
A webpage may scale its preview. Displaying an image element at 1024×1024 does not change the pixel dimensions stored in the original file. After downloading, inspect width and height in your system’s image information panel, or read the actual files with ImageMagick identify:
magick identify -format "%f %m %wx%h\n" *.pngThe three extracted groups contained six PNG files, each 1024×1024. The internal photograph dimensions of the padded outputs were checked using their white-border boundaries. Crop positions were checked against the central source pixels. Each version was then opened to inspect edge objects and the plate’s outline.
Once dimensions are correct, check four things: complete important text, enough space around the subject, natural proportions and a background that suits the final display. White padding blends into a white webpage but creates a visible white box on a dark interface. Transparency lets the interface background show through, provided the output format supports it and the destination handles transparent pixels as expected.
The six original downloads can be opened for comparison: landscape crop, landscape padding, landscape stretch, portrait crop, portrait padding and portrait stretch.
Choose the fitting method, export, and check both dimensions and content. That is how a 1024×1024 file becomes a usable picture.